How to create online shop very easily with Shopify

If you are planning to make BIG money online, your best and probably the most reliable bet is to create an online shop. The richest man in the world today is Jeff Bezos and guess what he does and the source of his wealth? He has an online shop known as Amazon! You must have heard of it or used it. But did you know that the website is making him billions of dollars every year? Today, we will practically show you how to create an online shop very easily using Shopify.
The internet has changed the way the world works. It has changed the way we buy things. Yes, it has changed the way we shop and make choices. Let me explain.
Before the internet, if you need to shop for a TV. You will need to get up, clean up, have your bath, have breakfast, and get on the road. Maybe drive for over one hour to the market. Locate a TV shop, and ask for the price. By this time the sun must have been out. You may probably spend the next two hours walking around different shops under the hot sun looking for the best TV deal, we all know we love ‘quality cheap things.’ To be sincere, who does not?
But the internet has changed all of that! Now you can sleep on your bed, pick up your phone, go online and shop for TV. With the help of search engine, you can find the best deal in 5 minutes at the cheapest price by just “googling it’. You click and order for it. Sleep for another 2 hours, by the time you wake up, your TV is at the door waiting for you! Isn’t that wonderful? That is the power of eCommerce, making things easy.
Creating an online shop simply means creating a website where people can visit and shop for items. It gets more interesting: thanks to platforms like Shopify, you do not need to have any capital, you do not need to have the items you are selling, just create the store, once someone orders, it will be delivered to them and you make money. No worries on your part about the items and delivery.
Now let us show you how to create an online store with Shopify and make money.
How to create online shop with shopify
Shopify is the best and easiest way to open an online store and they even offer a free trial. Click here to get 14 days free trial. You can try their services for 14 days free!
1. Sign up
The first step is to go to Shopify.com and sign up. Fill in the required details and click get started.
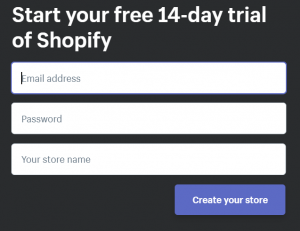
Once you have typed in your email and click get started. You will be taken to a page that requires you to type in your password and store name. Please note that your store name must be unique. You cannot use a name that has already been used by other users or else you will get an error message. So we suggest, you think of different variations of your shop name, just in case your most preferred name is already in use. The page looks like this:
After you typed in your password and store name, click on create store. You will then get a screen that looks like this:
“Site tight, we’re creating your store.” Don’t panic, just relax, and get a drink while Shopify sets up your store.
The next screen will ask you different questions. Are you selling yet? The drop-down will provide different answers. If you are not currently a seller offline or online but just starting out, select either ‘Am not selling a product yet or ‘am just playing around’. If you are selling only offline with a physical store then select “I’m selling, just not online.” If you are selling via another platform outside of Shopify, select “I sell with a different system.” The next question will ask about your current revenue. If you are just starting out selling whether online or offline, select ‘$0(am just getting started.” If you have been selling offline or on another platform then select the revenue that matches your business. Just select all information as appropriate.
Then it will go to the next screen. You will have to fill in your information. Name, address, country, phone. Fill it all up. Please it is important to provide only correct and accurate information so you get your payment without issues.
Congratulations! You have successfully created your store! At this point, if you prefer to hire a professional to complete the store for you, you can. Since you have created a store and have the login details. Note: Even if you want to hire someone to work it for you, please make sure you open it to this stage yourself, so you have access and no one can defraud you. But, you do not really need to hire someone if you do not want to. It is easy! Just continue reading and you will be able to set it all up, all by yourself!
2. Customize your store
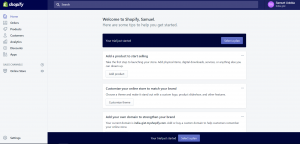
Once you have finished all processes in stage one, you will be redirected to your admin dashboard. Where you can customize your store, add products, set up payments and shipping, and hire experts. From there, it is pretty easy, just follow instructions from different sections. But we will guide you through some of the key options in the next stages. Here is what the admin screen looks like:
3. Hire a Shopify expert
For big businesses or individuals who want to get certified Shopify experts to handle the whole process for them, Shopify has a directory of experts to help. One of the reasons for hiring an expert, especially for established brands and major companies is for experience and optimized shop that will rank high. To hire a Shopify expert, from your dashboard, click on your name, then select ‘Hire a Shopify expert.” See the screenshot below:

Once you click on Hire Shopify expert, it will take you to a page where you select what help you need with. From there you can hire an expert. if you are not sure of what you need help with, simply go down the list and click “consult with an expert.” Here is what it looks like:
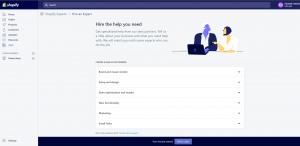
If you will rather customize your shop on your own without an expert then continue reading we will guide you.
4. Pick a theme
A theme will determine what your store looks like. So picking a theme should be a major part of creating your store. The themes in Shopify are well built and updated, so you don’t have to worry about that. There are free themes and there are paid themes. It all depends on your budget. If any of the free themes can take care of all your needs, why not? Use it. If you think you have enough budget to get a paid theme, why not?
Themes have different categories, to help you decide what is right for you.
In Shopify, you can make core changes to themes but there are few HTML and CSS limitations. And if you do not have coding knowledge and need to make core changes, you can always go to the marketplace and hire someone to do that for you as stated in stage 3.
To pick a theme check on your dashboard and click on ‘customize theme’ which is under “Customize your online store to match your brand.” See image:

If you cannot find that on your dashboard for any reason then go to themes.shopify.com
Browse through the theme store and pick a theme that works for you. There are filters when searching for themes on the theme store at the top of the page, use them to filter themes by category or any other criteria available, to help you pick a suitable theme for your store. Make sure when you select a theme, you check out the functionality to know its features, if it is responsive and has all the features you need. Also, try to read reviews! To know what those using it are saying about it.
Preview the theme before picking it. Click on view demo to see how it looks and see the different styles. Also, select the preview theme in your store to see how it will look once you decide to go with it. Once you have made up your mind on a theme, click the green button and get the theme. You may be prompted if you want to install the theme, click “Publish as my shop’s theme.” You can always change it later if you have a change of mind and pick another theme.
After this, you will be given the option “Go to your theme manager,” click on it to navigate there.
There you can edit the theme and make changes. You can upload your logo, chooses fonts, how you want the item to appear, and more.
5. Add products
Now that you have set up your theme it will decide how the store will look like. It is time to add products. To add product, Look at the left options on your dashboard, click on products. See screenshot below:
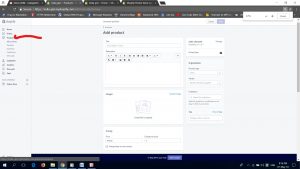
This place is very important for your sales. This where you manage SEO for your products. You set the title of your product here and enter product description here. So make sure you optimize your description for SEO. From here you set up price for product and also upload image for product. Make sure you pick a captivating image of your product that will attract buyers. And highlight every good point of your product.
When you click on product on the left side bar, options will appear below if. From there you can add collections (Group of products) you can also handle, transfers, gift cards and inventory from there. Add as many product as you want.
6. Set up Payment gateways
Payment gateways will control how you receive payment from your customers who purchase items on your online store. To go to this, click on settings at the bottom left of the page. Then click on payment providers. See screenshot
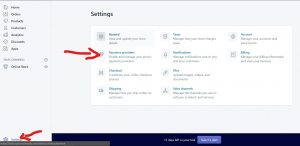
When setting up payment gateways, depending on the country you are using, there are various options. If you are in Nigeria for instance, one of the option is paystack, and paystack does not pay out to individuals unless you are an incorporated company. So you need to look at your options and conditions from gateways and pick another one that meets your expectation. Countries like US and UK have more options. Basically, every country has options. The key point you should consider when setting up gateway are:
Transaction fees: Some gateway may charge more per transaction than others
Accepted cards: Be sure your gateway accept the most used cards in your region
7. More settings
Spend more time trying to look at the options in settings. Look at the bottom left on the dashboard, then click settings. There are a lot of things you can do from there.
You can manage account permisions from there. By adding workers, Sales person, Developers and more.
You can manage billings from there, manage shipping and customize checkout process. Add tax information from there. It is important to do this before your shop can go live
8. Buy a domain
Before your site can go live, you need a domain name! A domain name will make you look like a proper brand. A domain means having www.myshop.com instead of myshop.shopify.com. The easiest way will be to buy a domain from shopify and it will be added to your store automatically.
Or you can buy from third party and change DNS records. Domain names are cheap and you can get that from $1 to $15 or more depending on the extension. A .com domain usually cost from $9 to $13.
These are the basic steps on how to create online shop with shopify. One good thing is that shopify is very responsive. If you run into trouble, you can got to help.shopify.com, from there you can even chat with them one one one and get help!
You can also contact us or most especially leave a comment below if you run into trouble.
We will try to update this post with more information from time to time. You can suggest which part you need more information on the comment and we will try to update.
There are other alternative to Shopify and we will cover them soon. But you can be sure that shopify is top of the list.
Don't miss a thing. Follow us on Telegram and Follow us on WhatsApp. If you love videos then also Subscribe to our YouTube Channel. We are on Twitter as MakeMoneyDotNG.


Great info. Thank you for sharing.
Please if I have my goods to sale on the shop how can ship it to the customers
Thanks for this information very helpful, my question is how and where do we get the product to be added on our shoplist from, are they already on the add or what please
You can copy inventories. There are options
My name is Sheila Otugo after my 14day free trial expired they said dat i can pick a plan that is i can re-open my account by picking a plan pls wat do they mean by dat
Hello, you will need to purchase a plan
If it is my own goods I want to sell how can I ship it to customers
Yes
The registration can’t go beyond first page, second page where email, password and shop name is is unavailable to submit.
Clear your cache and try again
GOOD TUTORIALS.PLS,CAN ONE MAKE ANY MONEY DURING THE 14 DAY TRIAL?
Unless you have a big audience or fund to spend on ads. Building a brand takes time unless you have funds to speed things up with ads
If I create a store how do I get the goods to showcase on online store before people will start buying and how will they get it since you said I don’t have to worry about that.
Thanks in anticipation
I love this, I shall try it out and would love to have you on air sharing this and more with Nigerians. Regards
If it’s my goods that I posted there, how can I ship them to customers that need it? . And how many people can see the site easy to access it.
Thanks a lot for sharing
Thanks very much sir for sharing. Will give it a trial.
Thanks very much sir for sharing. Will give it a trial.
Thank you for letting us know about this .
My own question is to know between A .Com domain and others which one is preferable and cheaper to us
Thanks for the information, a quick question when someone makes a purchase do shop owner get notified? And how will the buyer get product paid for, because it was mentioned that I can own a shop without having product inventory.
Can a phone do all this?
Great tutorial, I am an expert developer, and I am looking at the security issues themes can pose. Can I use the inbuilt security features in the theme or create my own from scratch which is the hard way out.